Azure Powershell – How to Build and Deploy Azure IaaS VMs

Throughout my career, my primary role has always been to make things more efficient and automated.  And now more than ever, automation is needed to manage and deploy IT services at scale to support our ever-changing needs.

In my opinion, one of the most convenient aspects of public cloud-based services is the ability to host virtual machines (VMs). Hosting VMs in the cloud doesn’t just mean putting your VMs in someone else’s datacenter. It’s a way to achieve a scalable, low-cost and resilient infrastructure in a matter of minutes.

What once required hardware purchases, layers of management approval and weeks of work now can be done with no hardware and in a fraction of the time. We still probably have those management layers though 🙁

Microsoft Azure is in the lead pack along with Google (GCP) and Amazon (AWS). Azure has made great strides over the past few years on in its Infrastructure as a Service (IaaS) service which allows you to host VMs in their cloud.

Azure provides a few different ways to build and deploy VMs in Azure.

  • You could choose to use the Azure portal, build VMs through Azure Resource Manager(ARM) templates and some PowerShell
  • Or you could simply use a set of PowerShell cmdlets to provision a VM and all its components from scratch.

Each has its advantages and drawbacks. However, the main reason to use PowerShell is for automation tasks. If you’re working on automated VM provisioning for various purposes, PowerShell is the way to go 😉
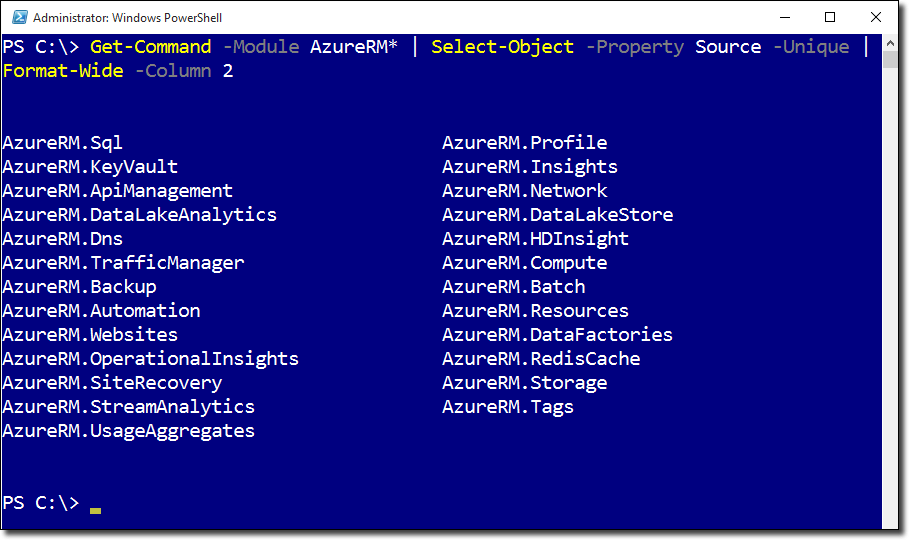
Let’s look at how we can use PowerShell to build all of the various components that a particular VM requires in Azure to eventually come up with a fully-functioning Azure VM.

To get started, you’ll first obviously need an Azure subscription. If you don’t, you can sign up for a free trial to start playing around. Once you have a subscription, I’m also going to be assuming you’re using at least Windows 10 with PowerShell version 6. Even though the commands I’ll be showing you might work fine on older versions of PowerShell, it’s always a good idea to work alongside me with the same version, if possible.

You’ll also need to have the Azure PowerShell module installed. This module contains hundreds of various cmdlets and sub-modules. The one we’ll be focusing on is called Azure.RM. This contains all of the cmdlets we’ll need to provision a VM in Azure.

Building a VM in Azure isn’t quite as simple as New-AzureVM; far from it actually. Granted, you might already have much of the underlying infrastructure required for a VM, but how do you build it out, I’ll be going over how to build every component necessary and will be assuming you’re beginning to work from a blank Azure subscription.
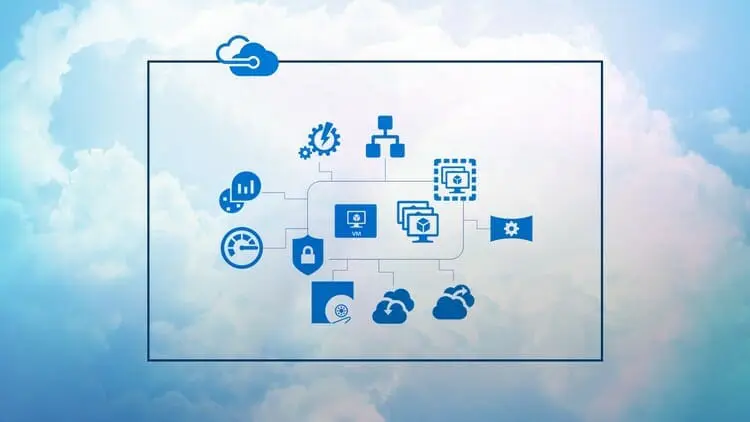
At its most basic, an ARM VM requires eight individual components

  1. A resource group
  2. A virtual network (VNET)
  3. A storage account
  4. A network interface with private IP on VNET
  5. A public IP address (if you need to access it from the Internet)
  6. An operating system
  7. An operating system disk
  8. The VM itself (compute)

In order to build any components between numbers 2 and 7, they must all reside in a resource group so we’ll need to build this first. We can then use it to place all the other components in. To create a resource group, we’ll use the New-AzureRmResourceGroup cmdlet. You can see below that I’m creating a resource group called NetWatchRG and placing it in the East US datacenter.

New-AzureRmResourceGroup -Name 'NetWatchRG' -Location 'East US'

Next, I’ll build the networking that is required for our VM. This requires both creating a virtual subnet and adding that to a virtual network. I’ll first build the subnet where I’ll assign my VM an IP address dynamically in the 10.0.1.0/24 network when it gets built.

$newSubnetParams = @{
'Name' = 'NetWatchSubnet'
'AddressPrefix' = '10.0.1.0/24'
}
$subnet = New-AzureRmVirtualNetworkSubnetConfig @newSubnetParams

Next, I’ll create my virtual network and place it in the resource group I just built. You’ll notice that the subnet’s network is a slice of the virtual network (my virtual network is a /16 while my subnet is a /24). This allows me to segment out my VMs

$newVNetParams = @{
'Name' = 'NetWatchNetwork'
'ResourceGroupName' = 'MyResourceGroup'
'Location' = 'West US'
'AddressPrefix' = '10.0.0.0/16'
'Subnet' = $subnet
}
$vNet = New-AzureRmVirtualNetwork @newVNetParams

Next, we’ll need somewhere to store the VM so we’ll need to build a storage account. You can see below that I’m building a storage account called NetWatchSA.

$newStorageAcctParams = @{
'Name' = 'NetWatchSA'
'ResourceGroupName' = 'NetWatchRG'
'Type' = 'Standard_LRS'
'Location' = 'East US'
}
$storageAccount = New-AzureRmStorageAccount @newStorageAcctParams

Once the storage account is built, I’ll now focus on building the public IP address. This is not required but if you’re just testing things out now it’s probably easiest to simply access your VM over the Internet rather than having to worry about setting up a VPN.

Here I’m calling it NetWatchPublicIP and I’m ensuring that it’s dynamic since I don’t care what the public IP address is. I’m using many of the same parameters as the other objects as well.

$newPublicIpParams = @{'Name' = 'NetWatchPublicIP''ResourceGroupName' = 'NetWatchRG''AllocationMethod' = 'Dynamic' ## Dynamic or Static'DomainNameLabel' = 'NETWATCHVM1''Location' = 'East US'}$publicIp = New-AzureRmPublicIpAddress @newPublicIpParams
Once the public IP address is created, I then need somehow to get connected to my virtual network and ultimately the Internet. I’ll create a network interface again using the same resource group and location again. You can also see how I’m slowly building all of the objects I need as I go along. Here I’m specifying the subnet ID I created earlier and the public IP address I just created. Each step requires objects from the previous steps.
$newVNicParams = @{
'Name' = 'NetWatchNic1'
'ResourceGroupName' = 'NetWatchRG'
'Location' = 'East US'
'SubnetId' = $vNet.Subnets[0].Id
'PublicIpAddressId' = $publicIp.Id
}
$vNic = New-AzureRmNetworkInterface @newVNicParams
Once we’ve got the underlying infrastructure defined, it’s now time to build the VM.
First, you’ll need to define the performance of the VM. Here I’m choosing the lowest performance option (and the cheapest) with a Standard A3. This is great for testing but might not be enough performance for your production environment.
$newConfigParams = @{
'VMName' = 'NETWATCHVM1'
'VMSize' = 'Standard_A3'
}
$vmConfig = New-AzureRmVMConfig @newConfigParams
Next, we need to create the OS itself. Here I’m specifying that I need a Windows VM, the name it will be, the password for the local administrator account and a couple of other Azure-specific parameters. However, by default, an Azure VM agent is installed anyway but does not automatically update itself. You don’t explicitly need a VM agent but it will come in handy if you begin to need more advanced automation capabilities down the road.
$newVmOsParams = @{
'Windows' = $true
'ComputerName' = 'NETWATCHVM1'
'Credential' = (Get-Credential -Message 'Type the name and password of the local administrator account.')
'ProvisionVMAgent' = $true
'EnableAutoUpdate' = $true
}
$vm = Set-AzureRmVMOperatingSystem @newVmOsParams -VM $vmConfig
Next, we need to pick what image our OS will come from. Here I’m picking Windows Server 2016 Datacenter with the latest patches. This will pick an image from the Azure image gallery to be used for our VM.
$newSourceImageParams = @{
'PublisherName' = 'MicrosoftWindowsServer'
'Version' = 'latest'
'Skus' = '2016-Datacenter'
'VM' = $vm
}$offer = Get-AzureRmVMImageOffer -Location 'East US' -PublisherName 'MicrosoftWindowsServer'
$vm = Set-AzureRmVMSourceImage @newSourceImageParams -Offer $offer.Offer
Next, we’ll attach the NIC we’ve built earlier to the VM and specify the NIC ID on the VM that we’d like to add it as in case we need to add more NICs later.
$vm = Add-AzureRmVMNetworkInterface -VM $vm -Id $vNic.Id
At this point, Azure still doesn’t know how you’d like the disk configuration on your VM. To define where the operating system will be stored, you’ll need to create an OS disk. The OS disk is a VHD that’s stored in your storage account. Here I’m putting the VHD in a VHDs storage container (folder) in Azure. This step gets a little convoluted since we must specify the VhdUri. This is the URI to the storage account we created earlier.
$osDiskUri = $storageAcct.PrimaryEndpoints.Blob.ToString() + "vhds/" + $vmName + $osDiskName + ".vhd"

$newOsDiskParams = @{
'Name' = 'OSDisk'
'CreateOption' = 'fromImage'
'VM' = $vm
'VhdUri' = $osDiskUri
}

$vm = Set-AzureRmVMOSDisk @newOsDiskParams
Ok, Whew! We now have all the components required to finally bring up our VM. To build the actual VM, we’ll use the New-AzureRmVM cmdlet. Since we’ve already done all of the hard work ahead of time, at this point, I simply need to pass the resource group name, the location, and the VM object which contains all of the configurations we just applied to it.
$newVmParams = @{
'ResourceGroupName' = 'NetWatchRG'
'Location' = 'East US'
'VM' = $vm
}
New-AzureRmVM @newVmParams

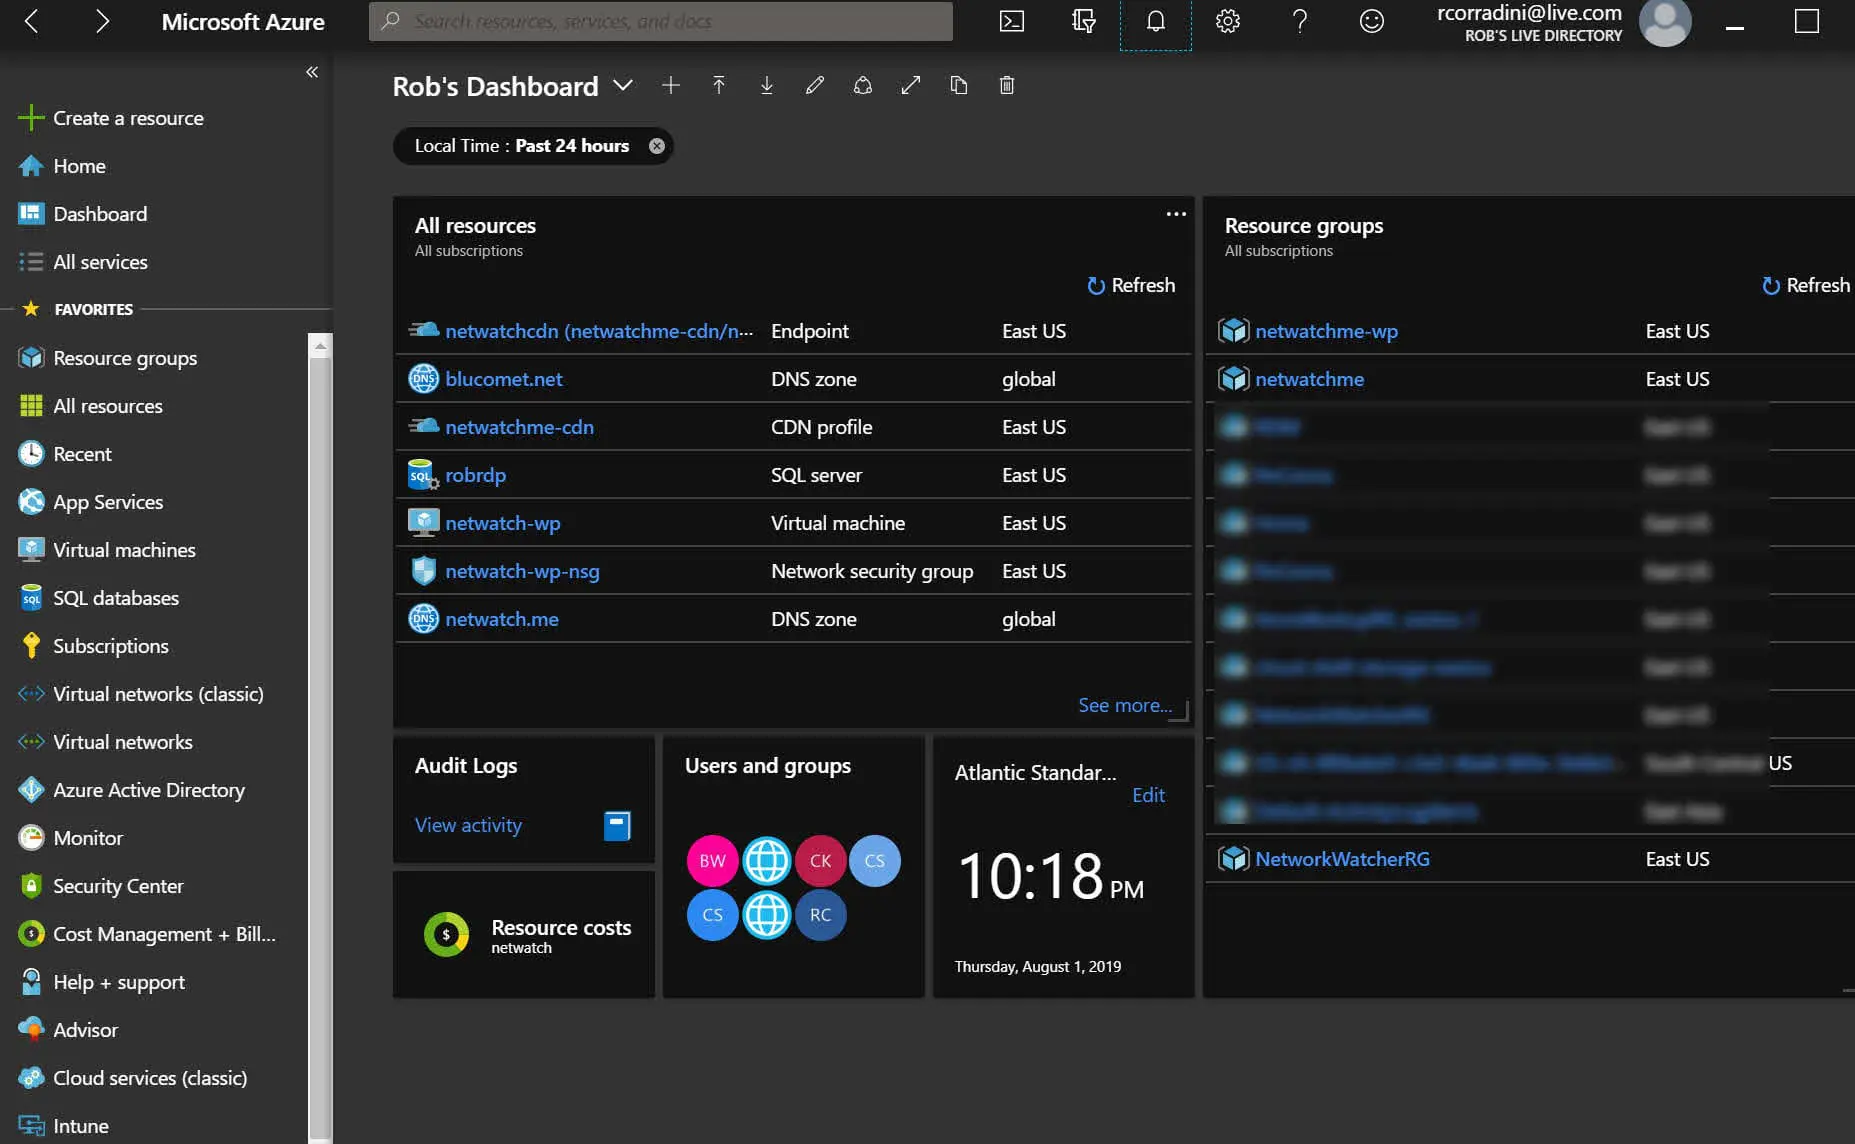
Your VM should now be showing up under the Virtual Machines section in the Azure portal. If you’d like to check on the VM from PowerShell you can also use the Get-AzureRmVM cmdlet.

Now that you’ve got all the basic code required to build a VM in Azure, I suggest you go and build a PowerShell script from this tutorial. Once you’re able to bring this code together into a script, building your second, third or tenth VM will be a breeze!

One final tip, in addition to managing Azure Portal through a browser, there are mobile apps for IOS and Android and now the new Azure portal app (Currently in Preview).  It gives you the same experience as the Azure Portal, without the need of a browser, like Microsoft Edge or Google Chrome.  Great for environments that have restrictions on browsing.
Until next time, Rob…

Microsoft Azure Cloud Series – Azure Resource Manager – Part 3

Hello everybody, time to get in-depth with Azure Resource Manager.  But, before I dive into the Azure Resource Manager, I would like to quickly review some of the basics in Azure.  I will start with a rundown of the Azure Global Footprint.  Then, I will go into how Azure charges are incurred.  And finally, I will dive into the Azure Resource Manager V2 and comparing it to the older Azure Service Manager V1.  Sit tight and let’s go for an Azure Ride 😉

Continue reading

Azure Stack…What is it?

The Ignite 2015 conference in Chicago is where Microsoft made the official announcement of Azure Stack, its private cloud infrastructure for data centers that want to be Azure in their own right. Or in other words, on-premises will be in full parity with Azure Cloud.
AzureStackW1 Azure Stack
Quotes from Brad Anderson from Keynote on Azure Stack
“If you think about Azure, there’s all the infrastructure that you’re aware of, in network, storage and compute. There’s a set of services like IaaS and PaaS that we deliver. And then there’s all your applications, and that, really, is what Azure is,” explained Brad Anderson, Microsoft’s corporate vice president for cloud and enterprise, during a keynote session Monday morning. “Two years ago, we announced we were going to bring portions of this to your data center, and we called it the Azure Pack.”

Portions of this Azure Pack had made their way onto partner vendors’ hardware in the past — in the form of Microsoft Private Cloud Fast Track Program and Dell’s Cloud Platform System. My company, Nutanix was one of the first Private Cloud Fast Track Partners with certified reference architecture.   So we’ve seen private cloud platforms with third-party vendor brands, built around server software made by Microsoft but not called Windows.

What Azure Stack becomes, over and above Azure Pack, is not just a microcosm of Azure, but an extension of Azure itself. As several Microsoft officials confirmed at Ignite, Azure Stack extends the file and object system of Azure into the private space. (And Azure Stack won’t be the only Microsoft technology that does this….Hint, Hint…Hmm…under NDA at moment)

“You want to be able to take those cloud applications, and host them in your environment,” said Anderson. “You’ve told us you want Azure — all of Azure — in your data centers. Azure Stack … is literally us giving you all of Azure to run in your data centers.

I saw early demonstrations of Azure Stack at Ignite, and what I saw was user access policy management system that essentially duplicated the one currently used on the public Azure cloud as shown below.

“The Microsoft Azure Stack gives application owners the ability to ‘write once, deploy anywhere,’ whether it be to your private cloud, a service provider’s cloud, or the public Azure cloud,” reads a post to Microsoft’s server and cloud blog Monday. “Developers will have the broadest access to application development platforms across Windows and Linux to build, deploy and operate cloud applications using consistent tools, processes and artifacts. One Azure ecosystem across public, private and hosted clouds will allow you to participate in a unified, robust partner network for Azure clouds.”

Microsoft’s idea is to make private cloud space and public space addressable and manageable using the same tool set, and by extension, to effectively make data centers into planks, if you will, for Azure. It’s one big reason why the words “Windows Server” are being spoken less and less often by people whom you would think were in charge of it.

Azure Stack Deeper Dive

Now let’s start at the top. When we look at the image below we see the browser experience. In the current version of Azure Pack we have 2 portals, 1 for the tenant and 1 for the admin. In Azure Stack we have 1 browser experience. That experience is also the same across Azure Stack and Azure. So admins as well as the tenants go through the same portal site and leveraging the same portal API’s and extensions.

In the deployment of the portal site there is still an option to scale out to multiple website nodes like we do with a distributed deployment of Windows Azure Pack today. When we go down that rabbit hole, we see the Azure Resource Manager and the Core Management Resource Providers. The Core Management Resource Providers integrate in Azure Resource Manager and all components interact with that. Below in this post,  I will focus on the Azure Resource Manager and the Core Resource Providers. Further down we see the Service Resource Providers. The Service Resource Providers will control and manage the resources it is assigned to. Like the Compute Service Resource Provider will manage the compute resources (nodes), the Storage Resource Provider will manage the storage resources (nodes) and so on…

And that’s really in a nutshell the top to bottom service layout of the Azure Stack.
AzureStackW2 Azure Stack

Let’s look at the portal. The portal is completely redesigned and which allow you to fully personalize. It is highly scalable and have integration across services. When you install new resource providers today in WAP you need to edit the core code for the Azure Pack portal. Then you need to restart the web service process to see the result of that change. With the new design the portal process runs continuously in a separate process and when you extend the portal by adding extensions a workflow will distribute the extensions to all nodes running the portal site. As mentioned before the admin and tenant site are integrated in the same portal.
AzureStackW3 Azure Stack
The portal UI is very nice, but it would be useless if we cannot login to the portal, right? Let me talk about the identity part of the new Azure Stack. In the old portal we had the options to use the SQL .Net membership or we could integrate ADFS to use AD or other federated identity providers (IDP’s). In the new portal they use claims-based authentication and there is native support for the following:

  • Azure Active Directory
  • Windows AD
  • Active Directory Federation Services (ADFS)

From the Azure Resource Manager to the Core Management Resource Providers it will use Windows Authentication or Basic Authentication. The Core Management Resource Providers will use Windows Authentication or an authentication method defined by the Resource Provider.
AzureStackW4 Azure Stack
Now on to the Azure Resource Manager. The Azure Resource Manager is the new Service Management API. It’s as Microsoft calls it “a product” that allows the management of the compute, storage, network. When you, as a tenant, create a resource group it allows you to put all the resources (VM’s, Networks, websites etc…) in a resource group that can be managed as a whole (Create /Add / Update /Delete – aka Life Cycle Management).

With role based access control (RBAC) you, as a tenant, can also provide access to other users that have access based on the permission you assign to the resource group. Also usage is collected for a particular resource group so you can see how much the resources in a resource group will cost.

The Azure Resource Manager will also allow you to put deployments in regions. Regions represents the datacenters of your service provider or your own datacenters. Furthermore the Azure Resource Manager is providing audit logging on your subscriptions and resources. To create resources using the Azure Resource Manager you need to create or use an existing template. A template is a json file what can be edited to define the resources in your deployment.
AzureStackW5 Azure Stack
The Azure Resource Manager will talk to the Core Management services. Let’s look at the components involved in that.

  • The Authorization Service: By using RBAC, it allows us to granular assign permissions to resource groups. Subscriptions are assigned to tenants that have a plan defined.
  • The Subscription Management Service is responsible for managing the Service Plans, Offers and subscriptions. You can even use Azure Resource Manager templates to define new subscriptions based on a template you have defined.
  • The Gallery Service is a core common service that will work across any of the connected services. Admins as well as tenants are allowed to put their own gallery items in it.
  • The Events Service is a collector to collect all events across all the services
  • The Monitoring Service collects metrics from all services.
  • And last but not least we have the Usage Service which will collect the usage per service for each tenant / resource group.

AzureStackW6 Azure Stack

So this what I know so far from MS, but will update this post as I know more. MS is not giving defiant answer, but rumors are beta late fall and Tech Preview in spring. I can’t wait to get the early bird bits to play around with it and when I do I will follow-up on this post to give you more technical information of Azure Stack!

Until next time, Rob…