Rekindling Romance: Navigating the Dating Scene After Divorce at 49 in Boston

Divorce can be a challenging and transformative experience as it has been for me. Still, it also opens up the opportunity for growth, self-discovery, and a new chapter in life. As a 49-year-old male in Boston, diving back into the dating scene after a divorce may seem daunting. However, with the right mindset and approach, you can find the ideal partner and rekindle the romance in your life.

  • Give Yourself Time to Heal

Before you start dating again, it’s crucial to allow yourself time to heal from the emotional turmoil of divorce. Take the time to process your feelings and focus on self-care. Engage in activities that bring you joy, connect with friends and family, and consider seeking professional help from a therapist or counselor if needed.

  • Establish a Solid Foundation

When you’re ready to start dating, it’s essential to have a strong sense of self and be clear on your values and goals. Ensure you clearly understand your relationship expectations and be prepared to communicate these with potential partners.

  • Utilize Online Dating Platforms

In today’s digital age, online dating platforms offer a convenient way to meet new people. There are numerous options catering to different preferences, such as eHarmony, Match, OkCupid, and niche dating sites for specific interests or age groups. Please don’t shy away from using these tools, as they can be an excellent way to connect with potential partners in Boston.

  • Attend Local Events and Activities

Boston is a vibrant city with a plethora of social events and activities. Attend local gatherings, such as wine tastings, book clubs, or cooking classes, to meet like-minded people. Volunteering is another excellent way to make new connections and foster meaningful relationships.

  • Be Open to New Experiences

Re-entering the dating scene might feel intimidating, but being open to new experiences is crucial for personal growth. Embrace the idea of meeting people from different backgrounds, trying new activities, and exploring Boston’s rich cultural scene. This approach will make dating more enjoyable and increase your chances of finding the right person.

  • Take it Slow

Rushing into a new relationship can be tempting, but taking things slow and allowing time to build trust and understanding is essential. Remember that you’re starting a new chapter in your life, and building a solid foundation for your future relationships is essential.

  • Seek Support

Having a solid support system is vital during dating after divorce. Reach out to friends and family for advice and encouragement. Consider joining a local support group or online forum where you can connect with others who have experienced similar situations.

  • Be Patient and Resilient

Finding the right partner may take time, and you might experience setbacks along the way. Stay patient and resilient, knowing each experience is a valuable opportunity to learn and grow. Don’t let temporary disappointments discourage you from pursuing your goals and finding the right person.

Conclusion

Dating after divorce can be a complex and challenging journey, but with the right mindset, tools, and support, you can find happiness and companionship in your post-divorce life. As a male, remember that this is an opportunity to rediscover yourself, create new connections, and ultimately find the right partner to share the next chapter of your life.

Until next time,

Rob

Azure vs AWS vs Google Cloud: The Ultimate Cloud Marketplace Showdown

Featured

In today’s rapidly evolving digital landscape, businesses and developers increasingly use cloud marketplaces to access various applications, services, and tools. The leading cloud providers—Microsoft Azure, Amazon Web Services (AWS), and Google Cloud Platform (GCP)—each offer a unique marketplace experience catering to diverse needs and preferences. This comprehensive blog post will dive deep into the world of cloud marketplaces, comparing Azure, AWS, and Google on multiple dimensions, including user experience, available services, pricing, and more. Let’s get started!

  1. User Experience

Azure Marketplace: Microsoft Azure boasts an intuitive and visually appealing user interface, making it easy for users to navigate and discover relevant services. A well-organized layout and comprehensive search functionality simplify finding, deploying, and managing applications and services.

AWS Marketplace: The AWS Marketplace is similarly user-friendly, with a clean interface allowing users to browse and find services without hassle. It offers advanced filtering options, enabling users to narrow their search based on specific criteria such as pricing, rating, etc.

Google Cloud Marketplace: Google Cloud Marketplace is known for its simplicity and easy-to-use interface. It incorporates Google’s signature minimalist design, making it an enjoyable user experience. Like the other two, Google Cloud Marketplace also provides advanced search and filtering options to streamline the search process.

  1. Available Services

Azure Marketplace: Azure Marketplace offers various applications and services, including AI and machine learning, data analytics, security, and IoT solutions. Microsoft has a robust ecosystem of partners, allowing them to provide a wide variety of third-party applications and services that cater to the unique needs of its customers.

AWS Marketplace: AWS Marketplace has an extensive selection of applications and services, making it one of the most comprehensive cloud marketplaces available. It covers everything from machine learning and big data to application development and security, ensuring users can find the tools to build and maintain their cloud infrastructure.

Google Cloud Marketplace: While Google Cloud Marketplace may not have as many offerings as Azure and AWS, it still provides an impressive range of services, including data analytics, AI and machine learning, and security tools. Google has rapidly expanded its marketplace, consistently adding new applications and services to stay competitive.

  1. Pricing

Azure Marketplace: Microsoft Azure follows a pay-as-you-go pricing model for most services, meaning users only pay for what they use. Some services have a fixed monthly fee, while others provide a combination of free and paid tiers. Azure also offers cost management tools to help users monitor and control their spending.

AWS Marketplace: Like Azure, AWS employs a pay-as-you-go model for most services. It also provides several cost-saving options, such as reserved instances and savings plans. AWS’s cost management tools allow users to track and optimize their spending across various services effectively.

Google Cloud Marketplace: Google Cloud also adheres to a pay-as-you-go pricing model, with additional options for committed use contracts and sustained discounts. Google’s pricing is often considered more competitive than Azure and AWS, making it an attractive choice for cost-conscious users.

  1. Support and Ecosystem

Azure Marketplace: Microsoft Azure has an extensive support network, including an active community forum, documentation, and tutorials. Additionally, users can access premium support services for a fee. The Azure ecosystem is expansive, with a multitude of partners offering a variety of services and applications.

AWS Marketplace: AWS provides many support options, including documentation, tutorials, and an active community forum. Like Azure, AWS also offers excellent support for a fee. The AWS ecosystem is vast, and its marketplace continually grows as more partners, and third-party providers join the platform.

Google Cloud Marketplace: Google Cloud offers a robust support system, including comprehensive documentation, tutorials, and a community forum. While premium support is available for a fee, Google also provides various free resources to help users navigate their cloud journey. The Google Cloud ecosystem is steadily growing, with new partners and third-party providers continually added to the marketplace.

  1. Compliance and Security

Azure Marketplace: Microsoft Azure is known for its commitment to security and compliance, offering various certifications and attestations to meet multiple industry standards. Azure’s Security Center provides users an integrated security monitoring and policy management solution to safeguard their cloud resources.

AWS Marketplace: AWS is equally committed to security and compliance, with numerous certifications and attestations available to address industry-specific requirements. AWS offers robust security features, such as identity and access management, threat detection, and encryption, ensuring a secure cloud environment for users.

Google Cloud Marketplace: Google Cloud takes security and compliance seriously, strongly focusing on data protection and privacy. It offers certifications and attestations to meet industry standards and provides tools like Cloud Security Command Center to help users monitor and manage their cloud security.

Conclusion

The choice between Azure, AWS, and Google Cloud Marketplaces ultimately depends on your unique needs, preferences, and budget. Each provider offers a slightly different user experience, range of services, pricing model, and support ecosystem. When selecting a cloud marketplace, consider your organization’s infrastructure, technical requirements, and long-term growth plans.

Microsoft Azure is an excellent choice for organizations already using Microsoft products and services, as it offers seamless integration with their existing infrastructure. AWS Marketplace provides many applications and services, making it ideal for those seeking a comprehensive cloud solution. With its competitive pricing and a strong focus on data protection, Google Cloud Marketplace is an attractive option for cost-conscious users and organizations prioritizing data privacy.

Ultimately, the best cloud marketplace for your organization will depend on your specific requirements and goals. Take the time to explore each platform, evaluate its offerings, and select the one that best aligns with your organization’s vision for the future.

Until next time,

Rob

Microsoft Teams vs Slack…Which Collaboration Tool is Right for Your Team?

Microsoft Teams and Slack are two of the most popular collaboration and communication platforms used by organizations today. Both platforms offer a wide range of features, including instant messaging, file sharing, video conferencing, and more. However, some key differences between Microsoft Teams and Slack are worth considering when choosing the right platform for your organization.

Integration: Microsoft Teams integrates with several other Microsoft applications, such as SharePoint, OneDrive, and OneNote, making it an ideal choice for organizations already using Microsoft products. Slack, on the other hand, integrates with a broader range of third-party applications and services, making it a good option for organizations that use various tools.

File Management: Microsoft Teams offers built-in file management capabilities with its integration with OneDrive and SharePoint. This means you can store, share, and access all your files in one place. Slack also has robust file management capabilities, but you may need to integrate it with a third-party storage solution to get the same functionality as Teams.

Video Conferencing: Both Microsoft Teams and Slack offer video conferencing capabilities, but Teams has a clear advantage here with its integration with Microsoft’s Teams Meetings. Teams Meetings offers advanced features such as screen sharing, recording, scheduling and joining meetings directly from the Teams app. Slack also provides video conferencing capabilities that are not as comprehensive as those offered by Teams.

Pricing: Both Microsoft Teams and Slack offer free and paid plans, but Microsoft Teams is generally more expensive than Slack. However, organizations with a Microsoft 365 subscription may find Teams a more cost-effective solution, as it is included in their subscription.

In conclusion, if you want to spice up your office communication and make it a bit more fun, you could try sending your colleagues messages in Morse code or using carrier pigeons instead of Microsoft Teams or Slack. But on a serious note, while both platforms have their pros and cons, ultimately, the choice between them should be based on your organization’s needs and preferences. So, pick the one that suits you best, and don’t forget to send a GIF or two to keep things lighthearted!

Until next time,

Rob

Azure Sentinel: The Future of Security Information and Event Management

Azure SentinelIn today’s digital world, protecting an organization’s information and assets from cyber threats has never been more critical. The rise in cyber attacks and security breaches has made it crucial for organizations to have a centralized platform to manage their security operations and respond to incidents promptly and effectively. That’s where Azure Sentinel comes in.

Azure Sentinel is a cloud-native Security Information and Event Management (SIEM) solution provided by Microsoft Azure. It provides a comprehensive security solution that integrates with existing security tools and cloud services to provide a complete view of an organization’s security landscape. Azure Sentinel is designed to help organizations quickly detect, investigate and respond to security threats and streamline their security operations.

Azure Sentinel Core

One of the key benefits of Azure Sentinel is its ability to provide a unified view of security events from various sources. It can collect data from on-premises, cloud, and hybrid environments and a wide range of security tools and services. This data is then aggregated and analyzed in real-time to provide organizations with a complete picture of their security posture. Azure Sentinel also uses machine learning algorithms to identify patterns and anomalies and to detect threats that might have gone unnoticed.

Another essential feature of Azure Sentinel is its ability to automate security workflows. It provides a flexible and powerful security automation and orchestration platform that enables organizations to respond to incidents quickly and effectively. Azure Sentinel provides built-in playbooks and pre-configured security workflows that specific events or conditions can trigger. Organizations can also create custom playbooks to automate their security operations.

In addition to its capabilities, Azure Sentinel is highly scalable, allowing organizations to manage security operations at any scale. It is built on Microsoft Azure, which provides a highly scalable, secure, and reliable platform for security operations. Azure Sentinel is also designed to be cost-effective, providing organizations with a cost-effective solution for managing their security operations without significant investments in hardware or software.

In conclusion, Azure Sentinel provides organizations with a comprehensive and centralized security solution that integrates with existing security tools and cloud services to provide a complete view of an organization’s security landscape. With its ability to detect and respond to threats quickly and effectively, automate security workflows, and provide a cost-effective solution, Azure Sentinel is the future of SIEM. Azure Sentinel is a solution worth considering if you’re looking to enhance your security posture and streamline your security operations.

Until next time, Rob

Azure Batch: A Comprehensive Guide

Azure Batch Example

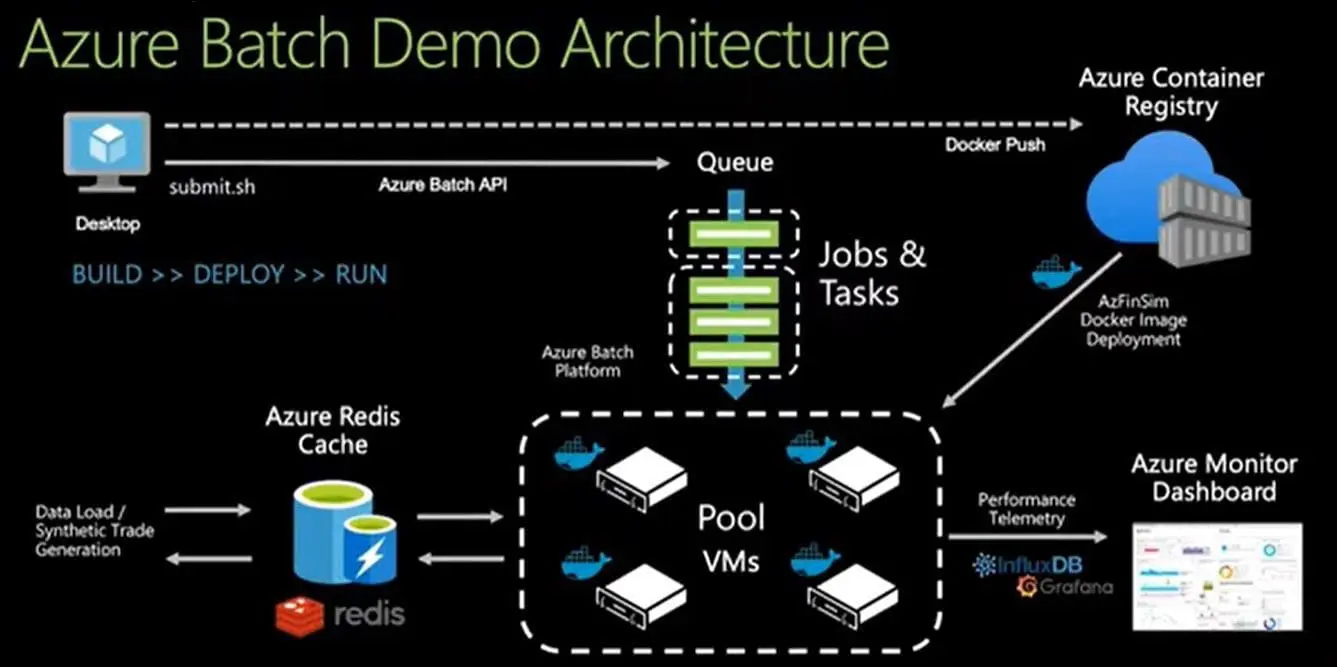
Azure Batch is a cloud-based platform offered by Microsoft Azure that enables users to run large-scale parallel and batch computing workloads. With Azure Batch, users can manage, schedule, and run their applications and tasks on a pool of virtual machines. This provides a flexible and scalable solution for businesses and organizations looking to run complex computing tasks in the cloud.

Key Features of Azure Batch

Scalability: Azure Batch allows users to scale their computing resources on demand, enabling them to handle even the largest computing workloads. The platform can automatically allocate and manage the virtual machines needed to run your tasks, ensuring that your applications have the resources they need to run smoothly.

Flexibility: Azure Batch supports a wide range of applications and languages, including .NET, Python, and Linux. This makes it easy for organizations to integrate their existing applications and tools with Azure Batch.

Monitoring and Management: Azure Batch provides real-time monitoring and management capabilities, making it easy to track your batch jobs’ progress and quickly identify and resolve any issues.

Cost-Effective: Azure Batch offers a pay-per-use pricing model, so you only pay for the resources you consume. This helps to keep costs down, making it an attractive solution for organizations looking to reduce their IT expenses.

How to Use Azure Batch

To get started with Azure Batch, you’ll need to create a Batch account in the Azure portal. Once your account is set up, you can create a pool of virtual machines to run your tasks on. These virtual machines can be managed and scaled using the Azure Batch API or the Azure portal.

Next, you’ll need to create a batch job to run your tasks on the virtual machines in your pool. A batch job is a collection of tasks executed on your pool’s virtual machines. You can submit your tasks to the job, and Azure Batch will automatically manage the distribution of the tasks across the virtual machines in your pool.

Once your batch job runs, you can monitor its progress in real-time using the Azure portal or the Azure Batch API. You can also retrieve detailed information about each task, such as its status and any errors that may have occurred during its execution.

Examples of Effective Usage

  • Use auto-scaling to save cost: Azure Batch provides an auto-scaling feature that automatically adds or removes compute nodes based on the demand for your applications. This helps you save cost by only paying for what you use and avoiding over-provisioning of compute resources. To enable auto-scaling, you can use the auto-pool and auto-scale features in the Azure portal or through the Azure Batch API.
  • Utilize the cloud-init script: You can use the cloud-init script to customize the behavior of your compute nodes. For example, you can use the script to install necessary software, configure firewall rules, or download data. The cloud-init script is executed every time a new compute node is created, ensuring that all nodes are consistently configured.
  • Make use of custom images: Azure Batch allows you to use custom images to deploy your applications, which can greatly reduce the time required to set up your
    environment. By creating a custom image with all the necessary software pre-installed, you can quickly create new compute nodes and start processing your data.
  • Take advantage of the task dependencies: Azure Batch provides the capability to specify task dependencies, which can help you ensure that tasks are executed in the correct order. You can use task dependencies to specify the order in which tasks are executed, or to make sure that a task is not executed until its dependencies have been completed.
  • Utilize the Job Preparation task: The Job Preparation task is a special task that runs on each compute node before the other tasks are executed. You can use the Job Preparation task to perform any necessary setup or configuration, such as installing software, copying data, or configuring firewall rules.
  • Monitor your jobs: Azure Batch provides robust monitoring capabilities that allow you to monitor the status of your jobs, tasks, and compute nodes. You can use the Azure portal, Azure Monitor, or the Azure Batch API to monitor your resources and get insights into the performance of your applications.

Conclusion

Azure Batch is a powerful and flexible platform for running large-scale batch computing workloads in the cloud. With its ability to scale resources on demand, support for a wide range of applications and languages, and real-time monitoring and management capabilities, it’s an attractive solution for organizations looking to take their computing to the next level. Whether you’re running scientific simulations, data processing, or any other type of batch computing workload, Azure Batch can help you get the job done quickly and efficiently.

Until next time, Rob

Scammers and Technology – How they invade your life via text, email, and social media – Part 1

Scammers are something that I have been watching for a long time. This is affected me personally with my mother, that was scammed years ago.  See “Police warn ‘Jamaican lottery’ scam preys on the elderly.”   When I say Scammers, I mean anybody using technology to take advantage of someone.

In this series of posts, I will break it all down starting from a consumer perspective on how people get scammed.

What does the scammer do simply?

They often make false promises, such as opportunities to buy products, invest your money, or receive free product trials. They may also offer you money through free grants and lotteries. Some scammers may call with threats of jail or lawsuits if you don’t pay them. Or just impersonate a famous person to gain trust and eventually your money.

Scams come in many forms and factors, but most of them are in trying to take advantage of our honesty. Text messages or any messaging app we use like these are quick to grab our attention. Studies show that the majority of incoming messages are opened within 15 minutes of receipt. Scammers know this and sometimes target consumers with “phishing” scams via text messages or another messaging service.

Smishing

Text message or SMS phishing—also called “smishing”—occurs when scammers use deceptive text messages to lure consumers into providing their personal or financial information. The scammers that send smishing messages often impersonate a government agency, bank, or other company to lend legitimacy to their claims. Smishing messages typically ask consumers to provide usernames and passwords, credit and debit card numbers, PINs, or other sensitive information that scammers can use to commit fraud. It can happen like this:

“John” received a text message that appeared to be from his local credit union. The message stated that his debit card had been deactivated. The message instructed him to call a toll-free telephone number, which he did. When John received a recording that asked him to enter his debit card and PIN, he hung up. He then called his credit union and spoke to a representative who stated his debit card was working properly and the text message was a scam.

“Catherine” received a text message from a local telephone number that stated she could receive a free $1,000 shopping spree at a big discount store if she were one of the first 100 visitors to a website linked to the message. Catherine immediately opened the link and was asked to enter her email address and credit card number. Catherine noticed that the website had the same color scheme and a similar font as the store’s website, but the store’s name was spelled incorrectly, and the URL did not start with “https://” like a secure website usually does. Catherine closed the link without providing any information and called her cell phone company to report the text message as a scam.

Social Media Scams

Scam #1: Social media phishing

Scammers create fake social media posts and profiles to convince you to share your personal or financial information. The profile may use a real company’s name or logo and often links to a fake website where you’re asked to enter your checking account or credit card number, SSN, or other sensitive information.

Common ploys include:

  • Requests to report vaccine side effects
  • Offers to receive grants or government benefits
  • Deep discounts on expensive products
  • Requests for charitable donations

If you provide your information to the scammer, it can be used to access your bank account, make fraudulent purchases, or steal your identity.

Other social media phishing tactics are quizzes that lure victims with clever questions such as “Which celebrity do you look like?” Launching a quiz app may unknowingly give a third-party access to your profile data that could be used to hijack your social media account or install malware.

Scam #2: Hacked profiles with requests for money

Instead of creating a fake profile, scammers may take over an existing one. This can happen when a scammer steals a username and password through a data breach, phishing, or malware. Scammers use the hacked profile to contact the person’s friends and family, ask for money, or promote a link to a fraudulent site they own.

Scam #3: Online dating

Scammers create fake social media profiles and use the promise of love to trick naive victims into sending them money. They may use a fictional name or falsely assume the identities of aid workers, military personnel, or professionals working abroad.

Once they gain your trust, they may claim to need funds for an emergency or other hardship and convince you to share your account information or send money before disappearing.

Some telltale signs of this scam include poor or vague communication, flowery language, a small number of Facebook or Instagram pictures and posts, or a Twitter account with just a few tweets.

Scam #4: Card cracking and job scams

In card cracking schemes, scammers use social media to post opportunities to make “easy money” in a way they say is “legit.” They typically request your debit card, PIN, and/or mobile banking username and password to deposit a fake check into your account. They may ask you to report your card lost or stolen or that your username and password have been compromised in order to seek reimbursement from your bank. In exchange, scammers promise you a portion of the money you deposit.

After gaining access to your account, scammers can transfer money or deposit phony checks and quickly make withdrawals before your bank identifies the bad checks. Not only are you robbed of your money, but you may also face hefty fines and criminal charges because your participation in this scheme makes you a co-conspirator.

In job scams, victims are promised a high-paying job in return for a small “advance fee” to secure a position that doesn’t actually exist. The phony employer may also send a new employee a fake check before their start date and require them to send back some money to pay for training or supplies. If the employee deposits the fake check, they will be responsible for the check amount and any money sent to the scammer.

Pull the plug on social media scammers with Do’s and Don’ts

Proof of social media’s explosive popularity is in the numbers. In 2021, 82% of the US population had a social networking profile.

A growing number of U.S. consumers are getting scammed on social media, according to a new report by the Federal Trade Commission (FTC), which revealed that consumers lost $770 million to social media scams in 2021 — a figure that accounted for about one-fourth of all fraud losses for the year.

  • Do set your profiles to private and restrict your social media contacts to people you know personally.

  • Do be on the lookout for suspicious posts, including limited-time offers, discounts that seem too good to be true, and requests for personal or account information.

  • Do be wary of individuals you meet through social media sites, especially if they promise romance before you’ve met in person.

  • Do create a unique username and password for each app and website you use to help protect against unauthorized access across multiple accounts.

  • Don’t accept friend requests from strangers.

  • Don’t respond to online solicitations for “easy money” and be wary of requests to send money back to an employer.

  • Don’t click on suspicious links, even in posts from people you know – their accounts may have been hacked.

  • Don’t fill out every field on your social media profile, such as your phone number and home address – including these details increases the chance of identity theft should you be hacked.

  • Don’t send money to someone you have only met online. If you receive a request from a friend or family member for money, always contact them using a different method to make sure their profile was not hacked.

  • Government agencies, banks, and other legitimate companies never ask via text message for personal or financial information, like usernames, passwords, PINs, or credit or debit card numbers.

  • Don’t be rushed. Smishing scams attempt to create a false sense of urgency by implying that an immediate response is required or that there is a limited time to respond.

  • Don’t “click” open links in unsolicited text messages. Clicking the link may infect your mobile device with a virus or malware designed to steal the personal or financial information stored on the device.

  • Don’t call a telephone number listed in an unsolicited text message. To hide their identity, scammers often use email-to-text technology, shortcodes, or spoofed local numbers. You should contact any bank, government, agency, or company identified in the text message using the information listed in your records.

  • Don’t respond to smishing messages; even to ask the sender to stop contacting you. Responding to smishing messages verifies that your phone number is active and that you are willing to open such messages, which may increase your unsolicited text messages.

  • Use caution when providing your cell phone number or other information in response to pop-up advertisements and “free trial” offers. This personal information can be easily bought, sold, and traded, making you a target for smishing scams.

  • Never provide your personal or financial information in response to text messages from unknown senders. Verify the identity of the sender and take the time to ask yourself why the sender is asking for your information.

  • Use the same safety and security practices on your cell phone as you do on your computer: be cautious of text messages from unknown senders and unusual text messages from senders you know, and keep your security software and applications up to date.

My next post will investigate one particular case I was involved in, and I will detail how the person was scammed and what we did to stop them and end it. 

Until next time,
Rob

Working Remotely as an IT Pro in this age of COVID-19 – Tips to a Successful WFH Strategy for your end-users

Hey All,

Its been a few months since I did my last blog post. Not making excuses, but working at an IT Director at a large Biotech can be challenging :).  I finally have some time to share some good tips I shared with my team and end-users during this COVID-19 Pandemic.  Having a good WFH (Work from Home) environment is key to keeping the balance at work and at home.

Get your technology in order

Technology is what enables remote work in the first place. So make sure to take your laptop home, and don’t forget your dock and charger. Also, take home your mouse, keyboard, and monitors — anything that might make working on your laptop from home a little easier. Then there’s the software. Make sure you have the right applications. Lots of remote workers are leaning heavily on Microsoft Teams. Slack, WebEx, and Zoom.  In fact, Microsoft is giving MS Teams out for free to use.

Iron out what your team is planning to use ASAP.  and of course, you’ll want to make sure all your technology actually works from home.

Make sure you have bandwidth

Another thing? Internet access — is yours robust enough at home to allow you to video conference? Many conferences and almost all nonessential work travel are being canceled right now, so people want to use online video conferencing, which requires a good Internet connection.  If your bandwidth is low and you’re on a video call, try shutting down other programs to lighten the load on your connection. If your connection is really choppy, you can often shut off the video portion of a call and participate with audio only, which defeats the purpose of seeing your team but will still allow you to participate in the conversation.

Another Internet hog? Kids.  If your connection is not robust, set some ground rules about when kids can’t be online because mom is on a conference call, or stagger your video meetings with your partner or other family members if possible

The kids are alright — but they’re home too

With school closures and concerns about putting kids in daycare, as well as staffing those places up, parents are faced with a challenge, especially parents who have to physically go to work because they have no remote work option. If you are working from home with kids in tow, you’ll need to make a plan for education and entertainment. Stock up on books and puzzles. Also, it’s OK to use streaming services (Common Sense Media has good recommendations for kid-appropriate content)

Manage expectations with Work

It’s wise to have a discussion with your manager about what can actually be accomplished from home.  Ask your manager what the priorities are, and discuss how tasks will get done.  How are teams going to track projects they’re working on? How will they meet to discuss this? Will you all be connecting on Microsoft Teams or email? Will there be standing meetings at a certain time to get everyone coordinated?  This should be an ongoing conversation. Remember, going fully remote is a new experience for many companies and their workers. Be honest about what isn’t working or can’t get done in these circumstances. More overall communication is going to be necessary.

Embrace the webcam

Conference calls are tough — there are time delays, not knowing who’s talking because you can’t see the person, people getting interrupted on accident. Webcams can solve a number of these issues: the sense of isolation and that confusion. “To be able to see the person you’re talking to I think is important,”. And also, because we miss cues when we aren’t working together in person, make doubly sure all colleagues understand their marching orders.  “Personally, I tend to overcommunicate, and I think that’s a good default setting,” Don’t be afraid to ask, “Is this clear?”   You can even try repeating back what you heard the other person say, to make sure you interpreted the person’s meaning correctly.

Stay connected

One undeniable loss is the social, casual “water cooler” conversation that connects us to people — if you’re not used to that loss, full-time remote work can feel isolating. To fill the gap, some co-workers are scheduling online social time to have conversations with no agenda. Use Microsoft Teams\Slack chats and things like that if you miss real-time interaction.  Again, embrace video calling and webcams so you can see your colleagues. Try an icebreaker over your team chat: What’s everyone’s favorite TV show right now? What’s one good thing that someone read that day?

Are you a Manager of a Team? – Have a Daily Stand-Up Meeting with your Team or a Virtual Lunch and Learn

Keep them quick and make sure everyone participates. We do this in my IT team every day. It keeps the team engaged. I plan on having virtual lunch and learns and have the company pickup lunch for the team.  Again…Keep everyone engaged.

Hopefully everyone is staying safe at home and off course keeping social distancing…Until next time and Stay Safe…..Rob

Azure Powershell – How to Build and Deploy Azure IaaS VMs

Throughout my career, my primary role has always been to make things more efficient and automated.  And now more than ever, automation is needed to manage and deploy IT services at scale to support our ever-changing needs.

In my opinion, one of the most convenient aspects of public cloud-based services is the ability to host virtual machines (VMs). Hosting VMs in the cloud doesn’t just mean putting your VMs in someone else’s datacenter. It’s a way to achieve a scalable, low-cost and resilient infrastructure in a matter of minutes.

What once required hardware purchases, layers of management approval and weeks of work now can be done with no hardware and in a fraction of the time. We still probably have those management layers though 🙁

Microsoft Azure is in the lead pack along with Google (GCP) and Amazon (AWS). Azure has made great strides over the past few years on in its Infrastructure as a Service (IaaS) service which allows you to host VMs in their cloud.

Azure provides a few different ways to build and deploy VMs in Azure.

  • You could choose to use the Azure portal, build VMs through Azure Resource Manager(ARM) templates and some PowerShell
  • Or you could simply use a set of PowerShell cmdlets to provision a VM and all its components from scratch.

Each has its advantages and drawbacks. However, the main reason to use PowerShell is for automation tasks. If you’re working on automated VM provisioning for various purposes, PowerShell is the way to go 😉
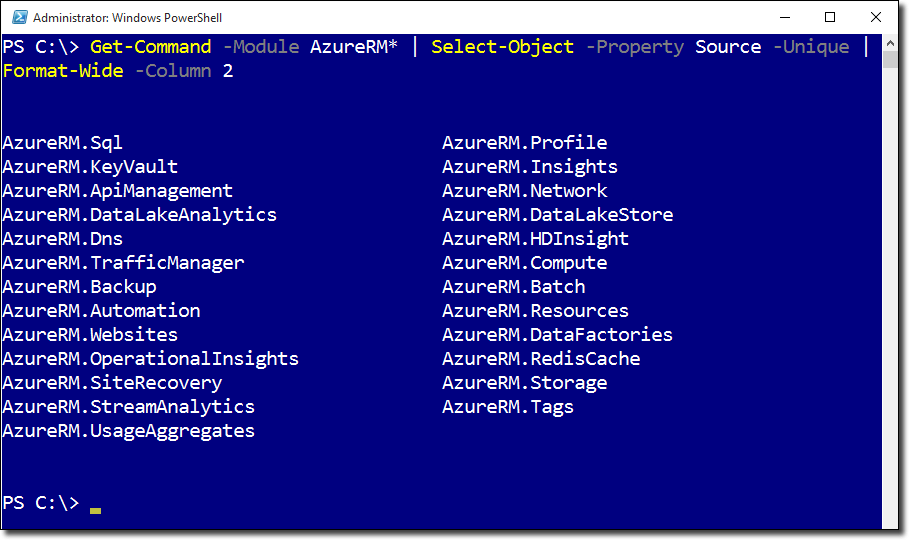
Let’s look at how we can use PowerShell to build all of the various components that a particular VM requires in Azure to eventually come up with a fully-functioning Azure VM.

To get started, you’ll first obviously need an Azure subscription. If you don’t, you can sign up for a free trial to start playing around. Once you have a subscription, I’m also going to be assuming you’re using at least Windows 10 with PowerShell version 6. Even though the commands I’ll be showing you might work fine on older versions of PowerShell, it’s always a good idea to work alongside me with the same version, if possible.

You’ll also need to have the Azure PowerShell module installed. This module contains hundreds of various cmdlets and sub-modules. The one we’ll be focusing on is called Azure.RM. This contains all of the cmdlets we’ll need to provision a VM in Azure.

Building a VM in Azure isn’t quite as simple as New-AzureVM; far from it actually. Granted, you might already have much of the underlying infrastructure required for a VM, but how do you build it out, I’ll be going over how to build every component necessary and will be assuming you’re beginning to work from a blank Azure subscription.

At its most basic, an ARM VM requires eight individual components

  1. A resource group
  2. A virtual network (VNET)
  3. A storage account
  4. A network interface with private IP on VNET
  5. A public IP address (if you need to access it from the Internet)
  6. An operating system
  7. An operating system disk
  8. The VM itself (compute)

In order to build any components between numbers 2 and 7, they must all reside in a resource group so we’ll need to build this first. We can then use it to place all the other components in. To create a resource group, we’ll use the New-AzureRmResourceGroup cmdlet. You can see below that I’m creating a resource group called NetWatchRG and placing it in the East US datacenter.

New-AzureRmResourceGroup -Name 'NetWatchRG' -Location 'East US'

Next, I’ll build the networking that is required for our VM. This requires both creating a virtual subnet and adding that to a virtual network. I’ll first build the subnet where I’ll assign my VM an IP address dynamically in the 10.0.1.0/24 network when it gets built.

$newSubnetParams = @{
'Name' = 'NetWatchSubnet'
'AddressPrefix' = '10.0.1.0/24'
}
$subnet = New-AzureRmVirtualNetworkSubnetConfig @newSubnetParams

Next, I’ll create my virtual network and place it in the resource group I just built. You’ll notice that the subnet’s network is a slice of the virtual network (my virtual network is a /16 while my subnet is a /24). This allows me to segment out my VMs

$newVNetParams = @{
'Name' = 'NetWatchNetwork'
'ResourceGroupName' = 'MyResourceGroup'
'Location' = 'West US'
'AddressPrefix' = '10.0.0.0/16'
'Subnet' = $subnet
}
$vNet = New-AzureRmVirtualNetwork @newVNetParams

Next, we’ll need somewhere to store the VM so we’ll need to build a storage account. You can see below that I’m building a storage account called NetWatchSA.

$newStorageAcctParams = @{
'Name' = 'NetWatchSA'
'ResourceGroupName' = 'NetWatchRG'
'Type' = 'Standard_LRS'
'Location' = 'East US'
}
$storageAccount = New-AzureRmStorageAccount @newStorageAcctParams

Once the storage account is built, I’ll now focus on building the public IP address. This is not required but if you’re just testing things out now it’s probably easiest to simply access your VM over the Internet rather than having to worry about setting up a VPN.

Here I’m calling it NetWatchPublicIP and I’m ensuring that it’s dynamic since I don’t care what the public IP address is. I’m using many of the same parameters as the other objects as well.

$newPublicIpParams = @{'Name' = 'NetWatchPublicIP''ResourceGroupName' = 'NetWatchRG''AllocationMethod' = 'Dynamic' ## Dynamic or Static'DomainNameLabel' = 'NETWATCHVM1''Location' = 'East US'}$publicIp = New-AzureRmPublicIpAddress @newPublicIpParams
Once the public IP address is created, I then need somehow to get connected to my virtual network and ultimately the Internet. I’ll create a network interface again using the same resource group and location again. You can also see how I’m slowly building all of the objects I need as I go along. Here I’m specifying the subnet ID I created earlier and the public IP address I just created. Each step requires objects from the previous steps.
$newVNicParams = @{
'Name' = 'NetWatchNic1'
'ResourceGroupName' = 'NetWatchRG'
'Location' = 'East US'
'SubnetId' = $vNet.Subnets[0].Id
'PublicIpAddressId' = $publicIp.Id
}
$vNic = New-AzureRmNetworkInterface @newVNicParams
Once we’ve got the underlying infrastructure defined, it’s now time to build the VM.
First, you’ll need to define the performance of the VM. Here I’m choosing the lowest performance option (and the cheapest) with a Standard A3. This is great for testing but might not be enough performance for your production environment.
$newConfigParams = @{
'VMName' = 'NETWATCHVM1'
'VMSize' = 'Standard_A3'
}
$vmConfig = New-AzureRmVMConfig @newConfigParams
Next, we need to create the OS itself. Here I’m specifying that I need a Windows VM, the name it will be, the password for the local administrator account and a couple of other Azure-specific parameters. However, by default, an Azure VM agent is installed anyway but does not automatically update itself. You don’t explicitly need a VM agent but it will come in handy if you begin to need more advanced automation capabilities down the road.
$newVmOsParams = @{
'Windows' = $true
'ComputerName' = 'NETWATCHVM1'
'Credential' = (Get-Credential -Message 'Type the name and password of the local administrator account.')
'ProvisionVMAgent' = $true
'EnableAutoUpdate' = $true
}
$vm = Set-AzureRmVMOperatingSystem @newVmOsParams -VM $vmConfig
Next, we need to pick what image our OS will come from. Here I’m picking Windows Server 2016 Datacenter with the latest patches. This will pick an image from the Azure image gallery to be used for our VM.
$newSourceImageParams = @{
'PublisherName' = 'MicrosoftWindowsServer'
'Version' = 'latest'
'Skus' = '2016-Datacenter'
'VM' = $vm
}$offer = Get-AzureRmVMImageOffer -Location 'East US' -PublisherName 'MicrosoftWindowsServer'
$vm = Set-AzureRmVMSourceImage @newSourceImageParams -Offer $offer.Offer
Next, we’ll attach the NIC we’ve built earlier to the VM and specify the NIC ID on the VM that we’d like to add it as in case we need to add more NICs later.
$vm = Add-AzureRmVMNetworkInterface -VM $vm -Id $vNic.Id
At this point, Azure still doesn’t know how you’d like the disk configuration on your VM. To define where the operating system will be stored, you’ll need to create an OS disk. The OS disk is a VHD that’s stored in your storage account. Here I’m putting the VHD in a VHDs storage container (folder) in Azure. This step gets a little convoluted since we must specify the VhdUri. This is the URI to the storage account we created earlier.
$osDiskUri = $storageAcct.PrimaryEndpoints.Blob.ToString() + "vhds/" + $vmName + $osDiskName + ".vhd"

$newOsDiskParams = @{
'Name' = 'OSDisk'
'CreateOption' = 'fromImage'
'VM' = $vm
'VhdUri' = $osDiskUri
}

$vm = Set-AzureRmVMOSDisk @newOsDiskParams
Ok, Whew! We now have all the components required to finally bring up our VM. To build the actual VM, we’ll use the New-AzureRmVM cmdlet. Since we’ve already done all of the hard work ahead of time, at this point, I simply need to pass the resource group name, the location, and the VM object which contains all of the configurations we just applied to it.
$newVmParams = @{
'ResourceGroupName' = 'NetWatchRG'
'Location' = 'East US'
'VM' = $vm
}
New-AzureRmVM @newVmParams

Your VM should now be showing up under the Virtual Machines section in the Azure portal. If you’d like to check on the VM from PowerShell you can also use the Get-AzureRmVM cmdlet.

Now that you’ve got all the basic code required to build a VM in Azure, I suggest you go and build a PowerShell script from this tutorial. Once you’re able to bring this code together into a script, building your second, third or tenth VM will be a breeze!

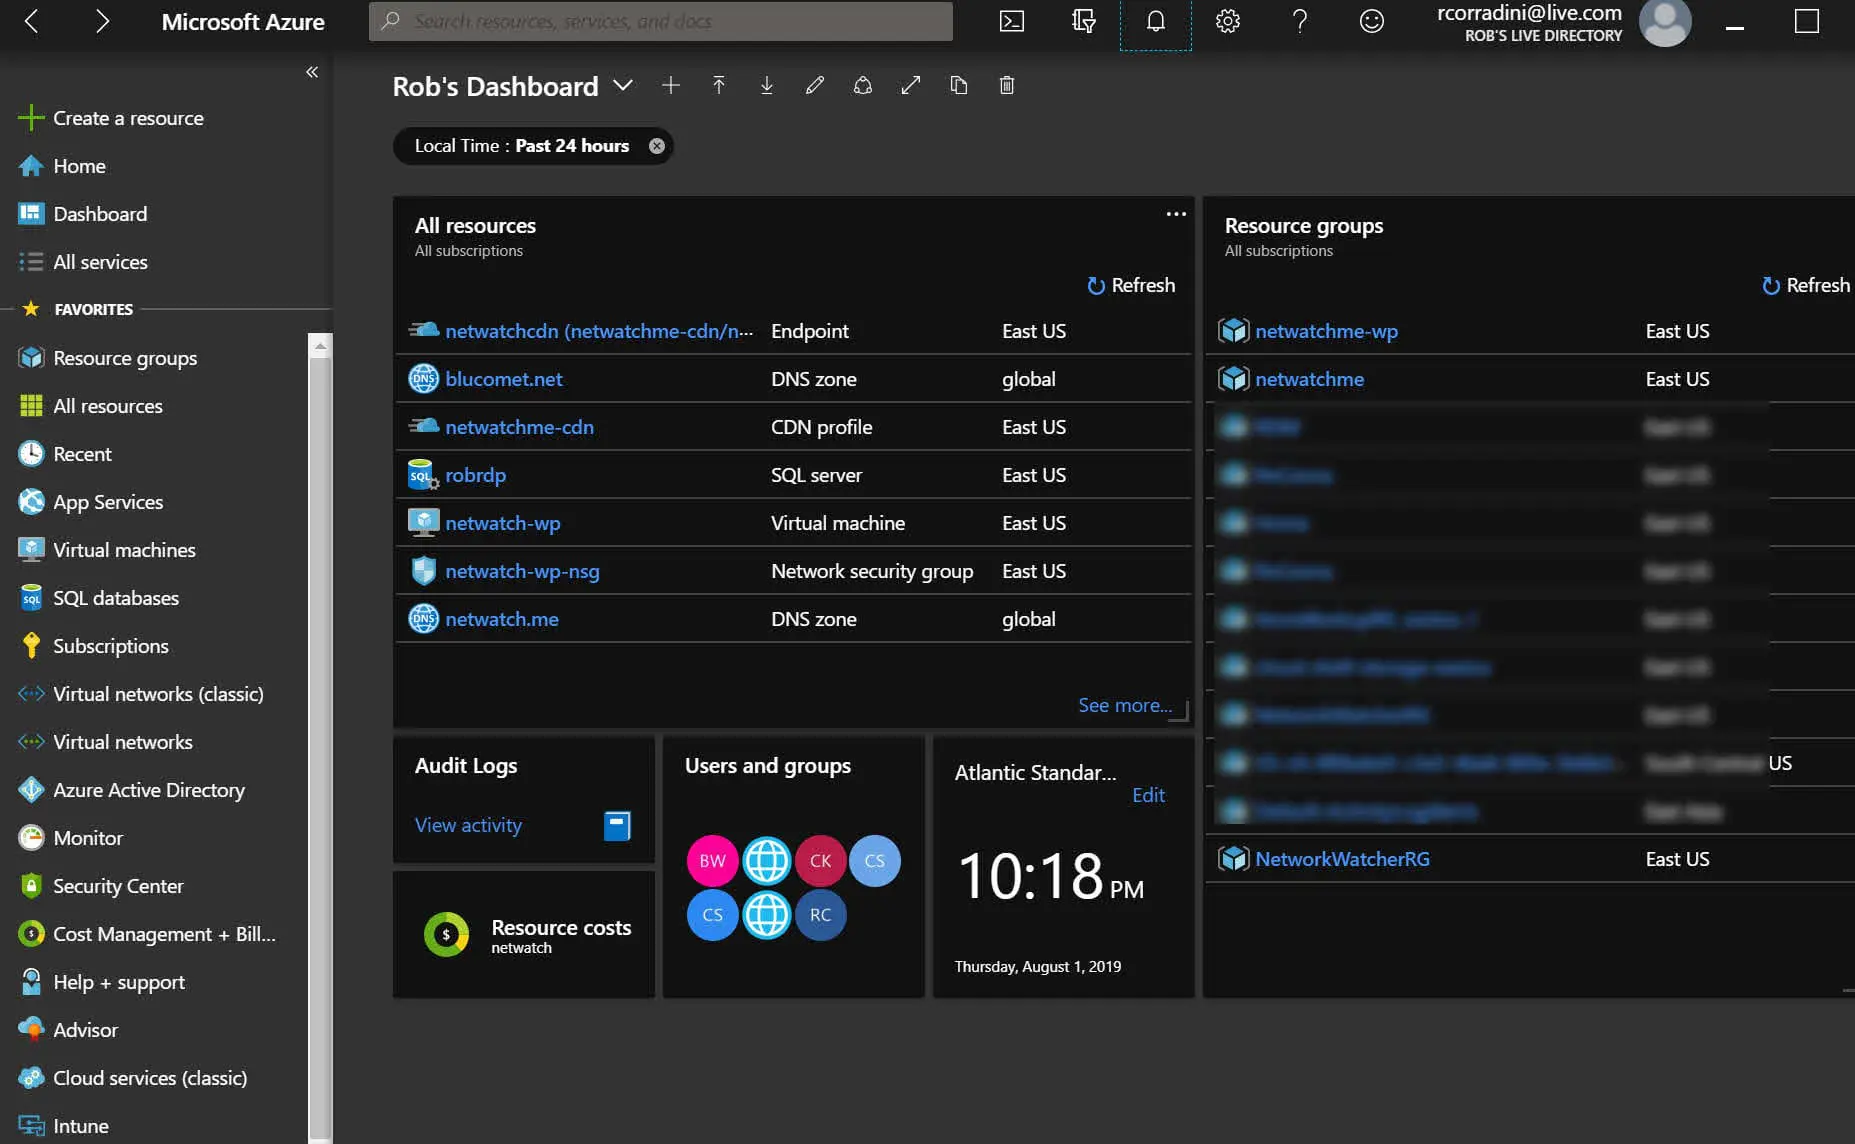
One final tip, in addition to managing Azure Portal through a browser, there are mobile apps for IOS and Android and now the new Azure portal app (Currently in Preview).  It gives you the same experience as the Azure Portal, without the need of a browser, like Microsoft Edge or Google Chrome.  Great for environments that have restrictions on browsing.
Until next time, Rob…